
if i'm short, sweet & to the point, please forgive me. :)
i had plans to post this last night, but had a 'doh!' homer moment when i sent the dude to bed with his jar!
so i had to wait until this morning to snap pictures in the ol' bathroom.
& now i'm trying to hurry before the babe wakes up from his morning nap..
because i spent the last 1/2 hr taking on sprinkler mechanics.
the blow up sprinkler he got for his birthday took a crapper 20 minutes in.
shame on manufacturers for getting a little boys super hero hopes up & then destroying them shortly thereafter!
(ps. he loved this for the short time it lasted, but skip it, trust me)
anyways. so yesterday was make something monday.
he was SUPER DUPER excited when i showed him the pictures of what we were going to do.
hasn't everyone on pinterest fell in love with this dreamy summer picture?

the best i can find, this here is the original source for this picture.
(if someone knows different, please send me the link so i can properly credit)
but to my great dismay upon finding the link, there were no 'real' directions other than to splatter paint inside.
so how to splatter?
well.. i worked on it a little before i called the dude out to help.
with that said. disregard the toothbrush in the picture. SO doesn't work.
but the good news is if you totally botch it the first try, rinse, wipe dry & give it another shot!
here's what we did.
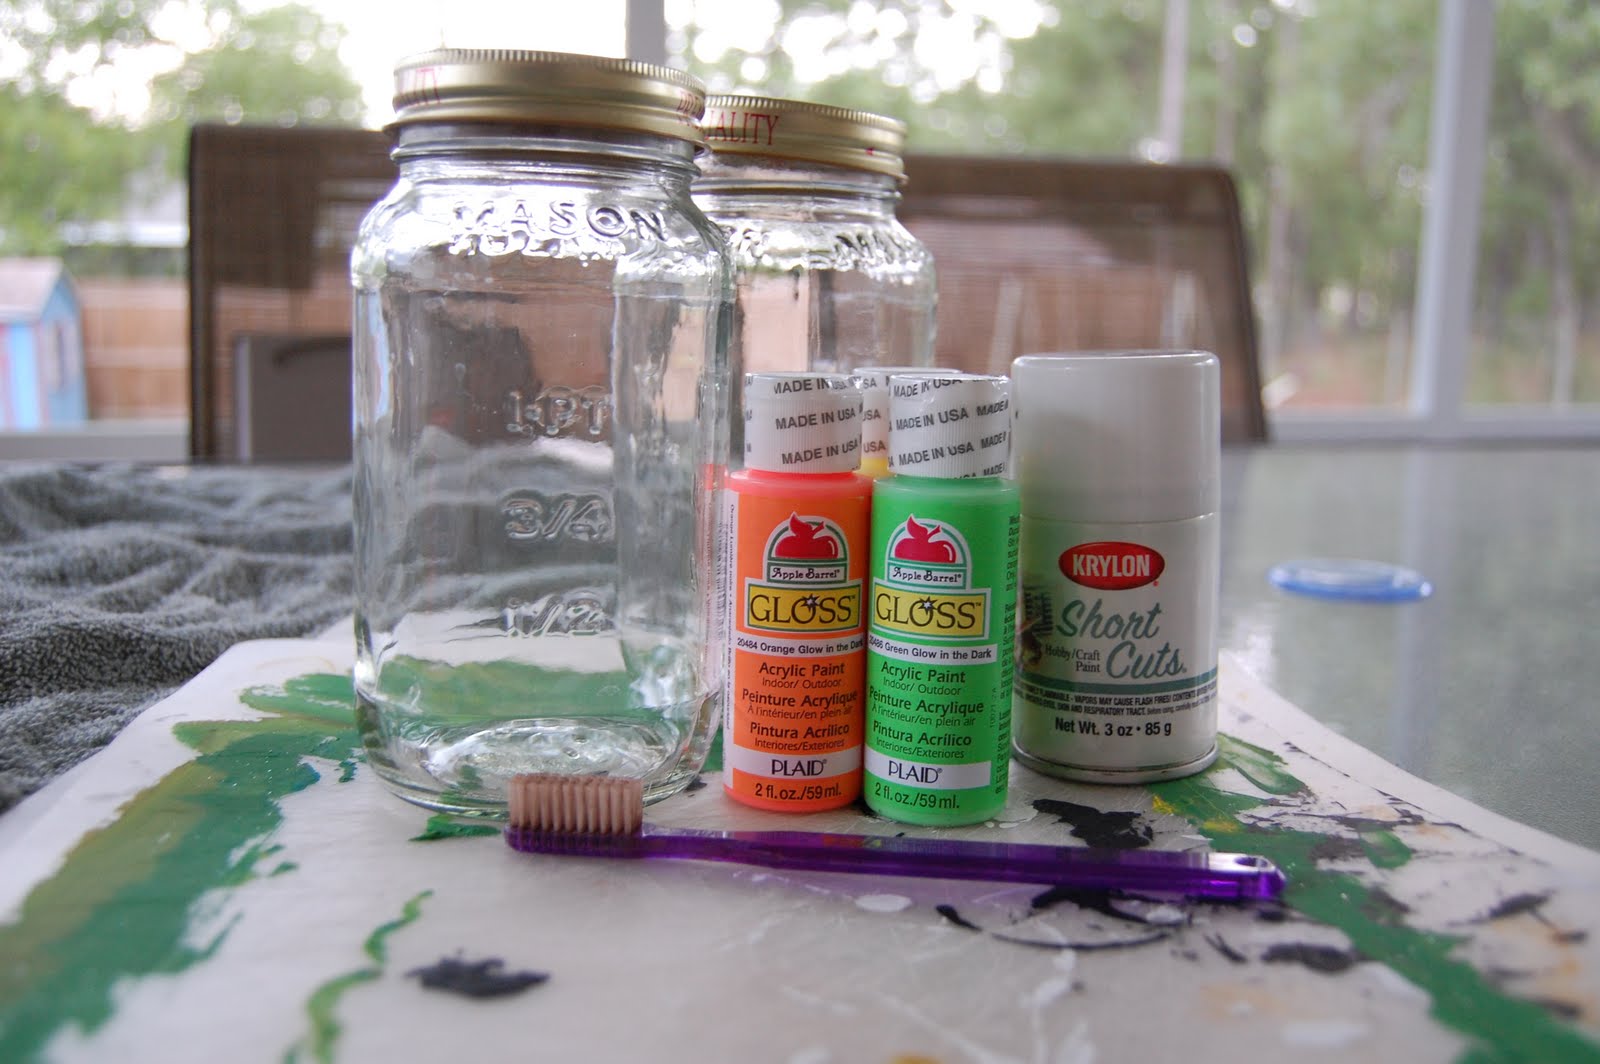
glow in the dark star jars:
-glow in the dark paint in various colors (.99 cent clearance at michaels. SCORE!:)
-mason jars (sam's club spaghetti sauce jars in their previous life)
-spray paint for lids
-table covering (please excuse my grungy old cutting mats. they are well loved!)
-small bristled paint brushes

(the dude trying desperately to splatter paint)

what i found worked the best. dip your SMALL paintbrush into whatever color you like (i suggest you start with the lightest colors, working to dark) put it into the neck of the jar. hold it at the tip firmly, then with your other hand flick the paintbrush with your fingers. as you work, turn the jar around, being sure to get coverage on all the sides.

we took ours inside to check how we liked them in the dark. during which mason decided he wanted his WHOLE jar to glow. so, we dumped in a bunch of green paint & swirled it to coat. he was TOTALLY psyched that his was brighter than mine, and i was so happy he was happy i didn't mention he missed the point of making it look like stars in a jar vs. a eerie lantern a la scooby doo. ya just got to roll with it sometimes right? :)

see. totally scooby doo-ish, right? he loved it!

and here are our finished jars. just spray paint the lid & when dry screw it on. (or leave it off if you want) in the end mine doesn't look like that first picture either. more like a psychotropic jackson pollock. and ya know what, i'm ok with that too! :)
hope you are having a great summer, wherever you are & whatever you are doing!
xo-k
I have wanted to try that too. Thanks for the tips. My first thought was the toothbrush too. Now I know to skip it. Thanks again
ReplyDeleteNeat! I think I'd go for the Scooby Doo one, too - that thing is awesome!
ReplyDeleteSuper fun project! I was thinking about a replacement project for tie-dye shirts...this one is perfect!
ReplyDeleteWhat a fun idea!! I have three boys who would LOVE this project. Thanks for sharing!
ReplyDeleteJaimee @ craft-interrupted.blogspot.com
Such a great idea! I don't have any kids, I just think it'd be cool for myself haha.
ReplyDelete*Coley*
www.whatyoumakeit-coley.blogspot.com
Neat-o! We just discovered glow-in-the-dark modge podge over at our house...
ReplyDeleteWhoa, that is totally cool. I am definitely going to try this one!!
ReplyDeleteOh my gosh... I have a stack of jars. I am SO doing this! LOVE for you to share this at my For the Kids Link party!!! Stop by!
ReplyDeletehttp://SunScholars.blogspot.com
I'm a new follower... and I just shared this post with my Facebook friends, and pinned it :)
ReplyDeleteLove to have you stop by and follow me too!
this is fantastic I can't wait to try it with my nieces
ReplyDeleteThanks for an actusl tutorial! In a wonderful hoax, I assume, my pin on Pinterest linked to a porn site...with my son standing right next to me!
ReplyDeletelooking at the "original" photo - it has some extra light source in it, behind that mound of fabric.
ReplyDeleteI would say they are probably black light paint...
Now YOURS - that is a real DIY version that WORKS!!!
I'll be pinning yours! Thanks for taking the time to work it out & photo it.
Found you through a blog hop & so glad I did that is a great idea!
ReplyDeletehttp://lookingforisis.blogspot.com/
I would assume they don't look the same because yours are shown outdoors? The original picture looks like the jars are under a black light. I am so going to try this!!
ReplyDeleteHow long did the glow paint stay illuminated?
ReplyDeleteI tried this with neon paint and it didn't glow but I'm having a hard time finding paint that glows in the dark without a black light. Any help would be appreciated in finding the right paint.
ReplyDeletethanks, I've been looking for a tutorial on this for a while. I think i'm going to try and use a silver or white paint.
ReplyDeleteI wanted to make this for a youth camp I'm in charge of this summer. I've been looking up the different ideas for what people have done to recreate this. Thanks for your tips!
ReplyDeleteI found this link on another blog that shows this is the original tutorial:
http://frompankawithlove.wordpress.com/2012/01/08/glowing-jar-project-varazslat-a-lakasban-enhu/
I have seen this with glow sticks, you break them to glow then cut the bottom and shake them around in the jars.
ReplyDeleteI found the original first before I found your instructions and how-to (THANK YOU!) Here is the link to the original photographer, FYI...
ReplyDeletehttp://bucikah.deviantart.com/art/Undiscovered-galaxies-259169962?q=gallery%3Abucikah%2F18755802&qo=0
The original photo and tutorial are From Panka with Love here: http://frompankawithlove.blogspot.com/2012/01/glowing-jar-project-varazslat-lakasban.html His was the original photograph.
ReplyDeleteThese glow in the dark star jars are so beautiful! They are so relaxing to look at. Not only will children enjoy looking at these jars but the elderly as well. People will be able to unwind just by looking at it intently. :')
ReplyDeleteTucker Inman